How to Connect a Custom Domain to your Site for Free
Published 31 July 2018 in websites
Making sure your network of online profiles and sites are named consistently is important for your brand, especially if you are a professional. The process of connecting a custom domain or subdomain to your blog or website may seem challenging for a beginner, but thankfully it's easier than you may think. The most complicated aspect of it is that the way you do it varies depending on your host and domain name registrar (DNR). I only have experience working with Namecheap, so for this post I will be explaining how to connect domains and subdomains from this DNR to my favorite free hosting providers Tumblr, Github Pages, and x10Hosting.com.
What is a DNR?
For those who don’t know, domain name registrars are sites where you can purchase and manage domain names and make use of additional features such as subdomain creation, URL redirection, and email forwarding. The registrar I use is Namecheap.com because as its name implies, the domains on there are very cheap when compared to competitors and honestly a much better alternative to a “free domain” with a paid hosting plan (although I’ll leave that explanation for another post).
The Process
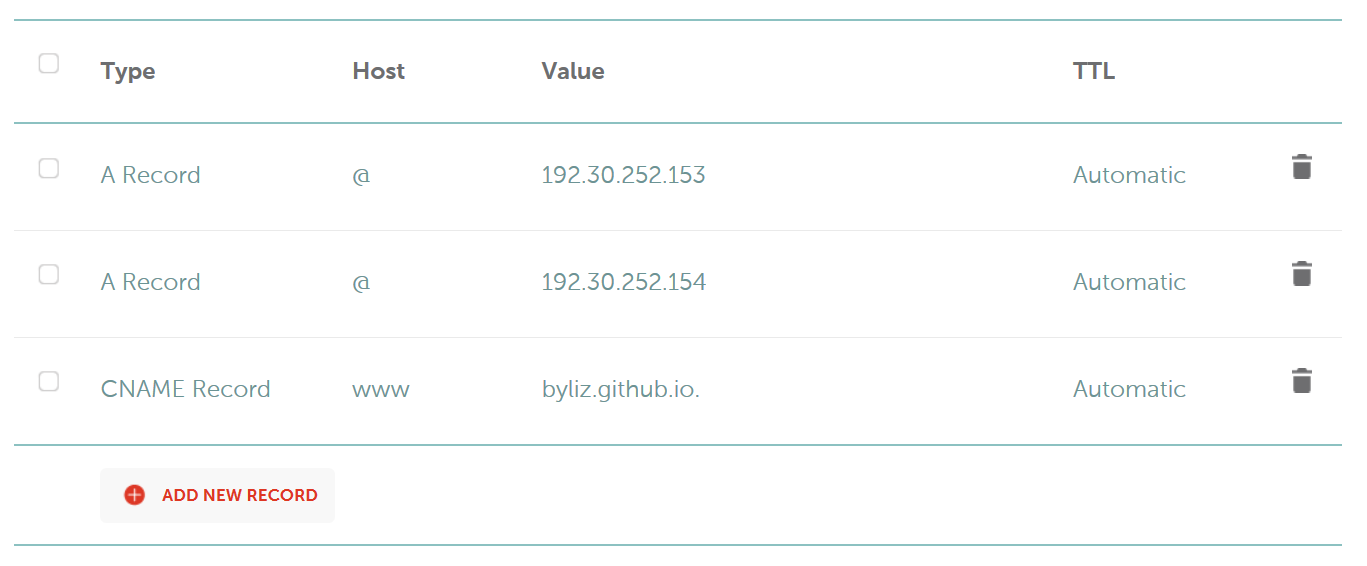
After purchasing a domain, go to your Namecheap dashboard and click on “Domain List” on the left sidebar. Click on “Manage” next to your domain name and go to “Advanced DNS”. Under “Host Records” you can add new records in order to connect your domains or subdomains to your free sites. When connecting domains to sites, there's two records that are used: A records and CNAME records. A records point to nameservers, and CNAME records point to the original domain. Remember that it may take 30 minutes to 24 hours for records to take effect. Clearing your browser's cache may help speed up the process. Also, Namecheap logs you out after a few minutes of inactivity for your protection, so don't be alarmed if your changes don't save - just refresh the page and log in again.
For Tumblr
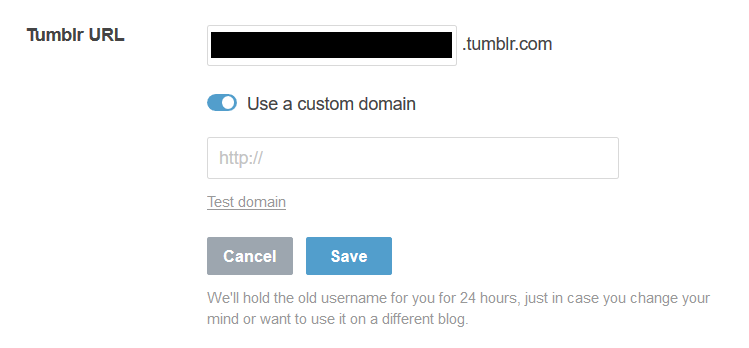
Where you type your domain in your Tumblr blog settings
To navigate to where you'll add your domain, go to the little person icon in the top right of your page and click "Edit Appearance" under the Tumblr to which you want to attach your domain. Then click the little pencil icon next to your "Tumblr URL" to edit your domain. Click the little slide button next to "Use a custom domain". You'll want to type it in immediately, but not so fast.
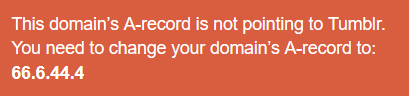
Error message for custom domain
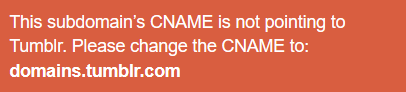
Error message for custom subdomain
Click "Test Domain" and you'll see there's some work to do. To use your domain, go back to Namecheap and add two records. You'll want these two records to look like this:
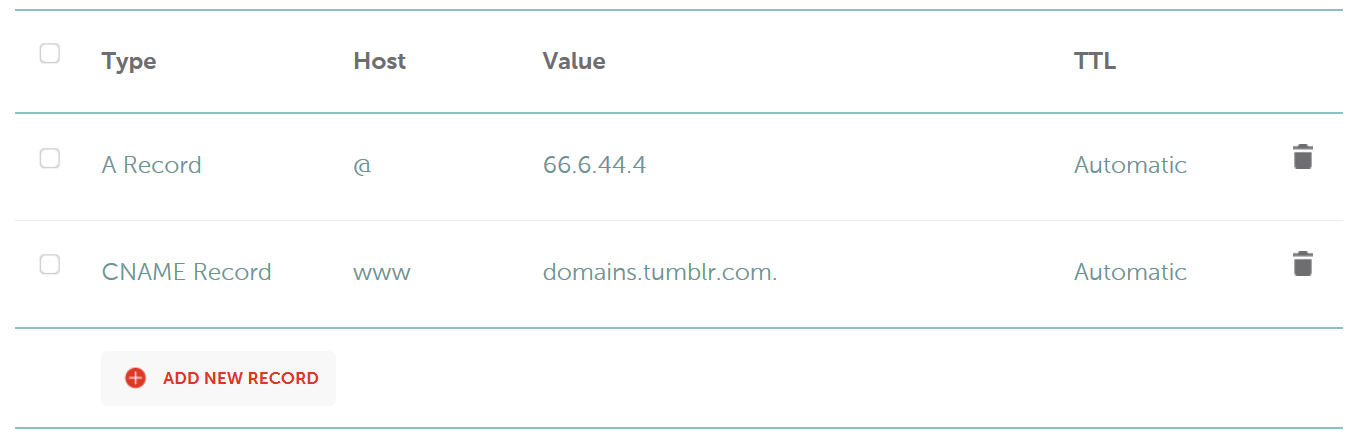
To use a subdomain, simply change the value of the Host in the CNAME record from www to your desired subdomain. If you want, you can even delete the A record, and it should still work. Now you can attach this domain to any of your Tumblr blogs!
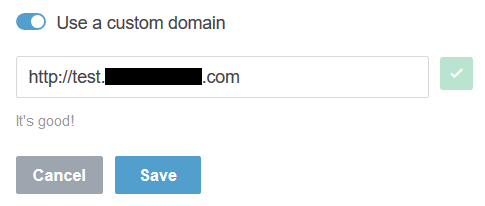
Success.
Github Pages
First create a new repository by clicking on the plus button to the left of your profile picture in the top right corner of the page. Click "New repository", name it, type a description for it if you want, and make sure to fill the checkbox to create a README.md file. Next, click the Settings tab of your newly made repo, scroll down to "Github Pages", and set the Source to "master branch". Save it, and Github Pages will now be enabled for your repository. Then you can upload your index.html and other files. You can nab a one-time Github.io subdomain for free if you name your repo "username.github.io".
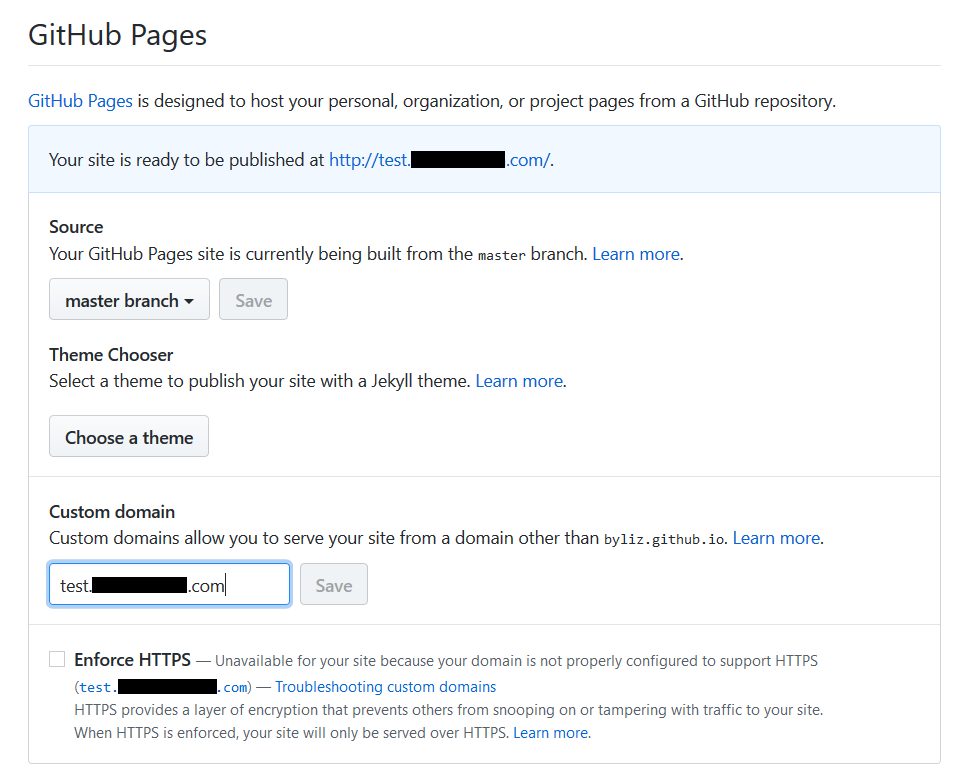
However, you can attach your own purchased domain or subdomains to any of your repositories, by editing your Namecheap records and then typing in your domain or subdomain in the Custom domain section. Note that, unlike with Tumblr, your site will not have HTTPS if you apply a custom domain.
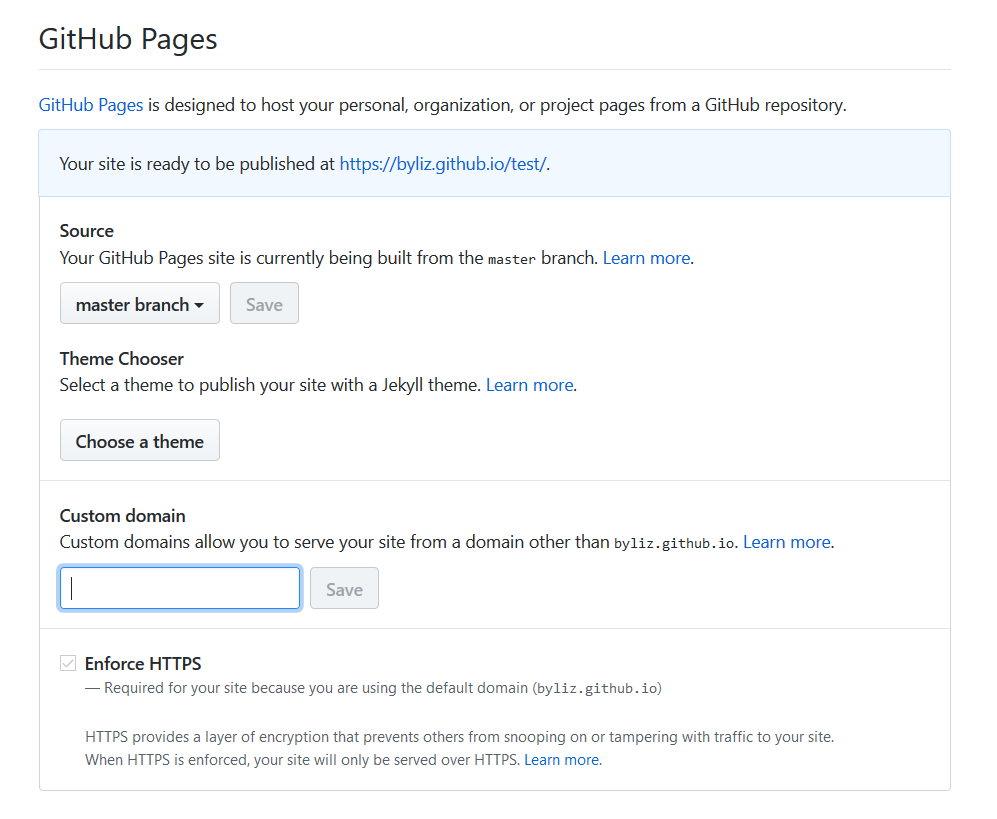
The GitHub Pages settings for your repo
To be able to set a custom domain, add these records in Namecheap:
For the subdomain, you can do the same as you do for attaching a subdomain on Tumblr. Now, you can attach your domain to any of your repos!
Another success!
You should now see a CNAME file in your repo that contains nothing but the domain or subdomain your static site now uses.

The new CNAME file
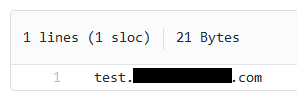
The contents of the CNAME file
x10Hosting
Now with x10Hosting.com, connecting a domain is different because the website uses cPanel and requires you to park your domain on their servers. Because of this, they can impose limits on how many domains and subdomains you can use to create websites.
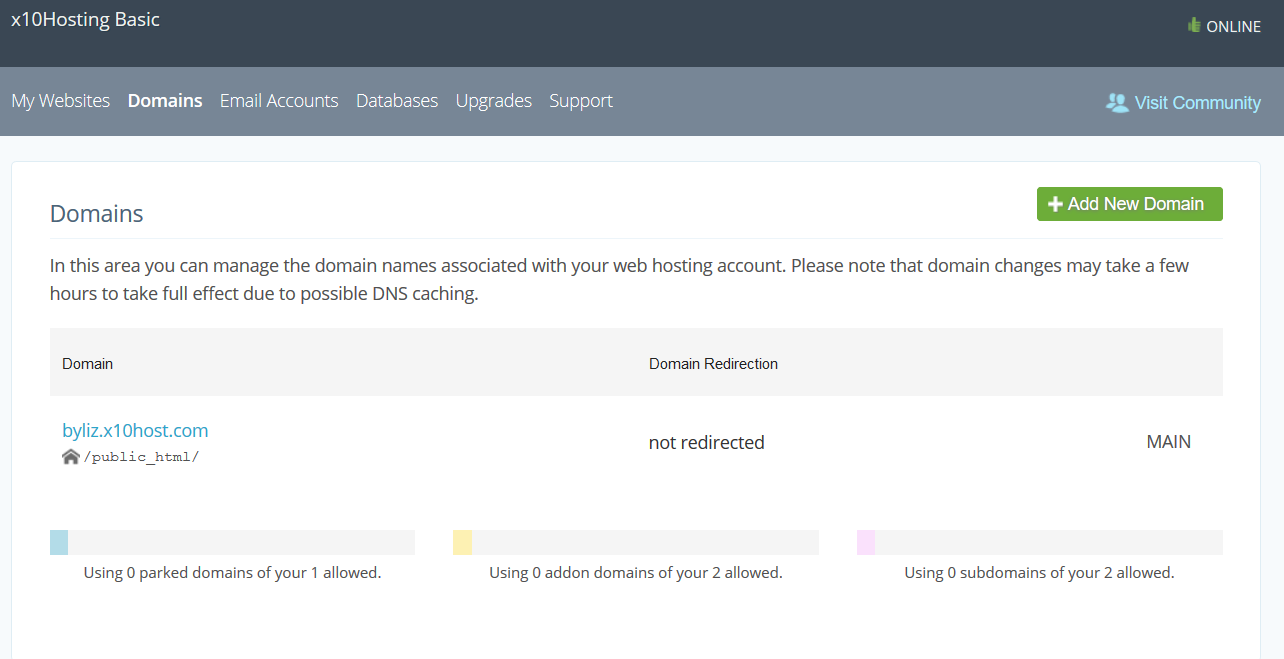
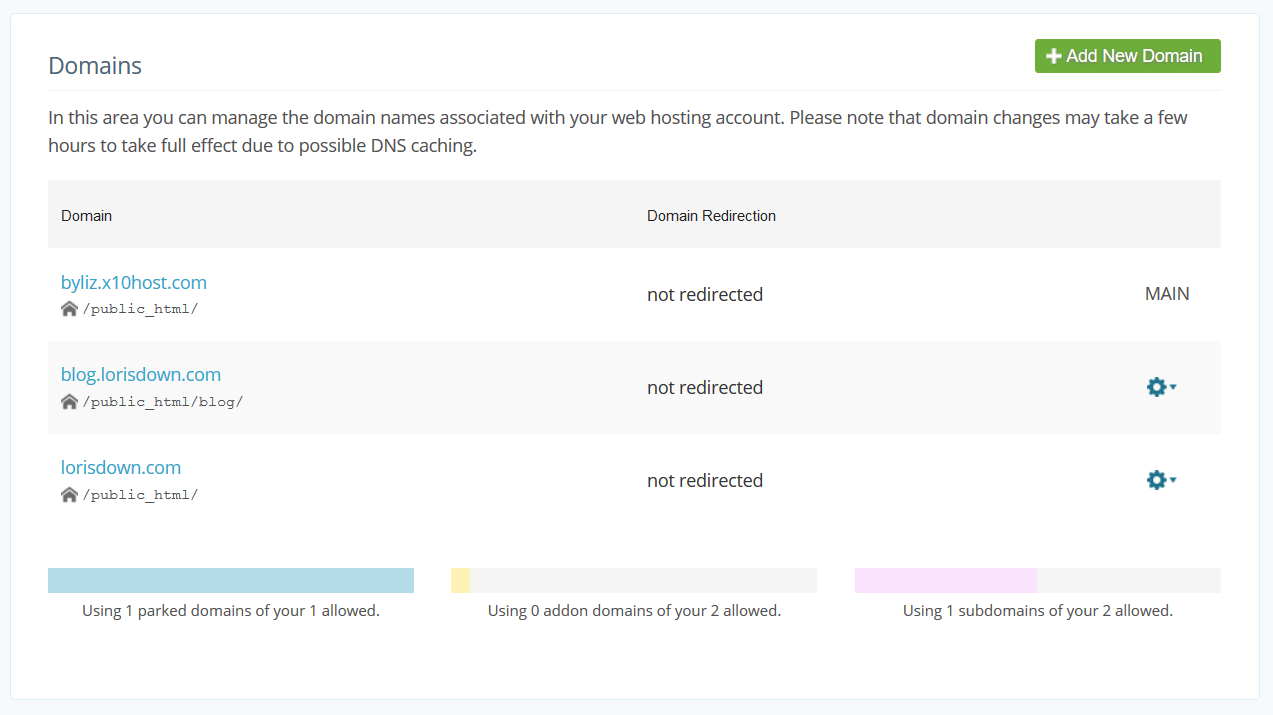
You are allowed only 1 parked domain and 2 subdomains.
Once you log in, click the button to open your cPanel. Click on "Domains" and then click on the green button to add a new domain.
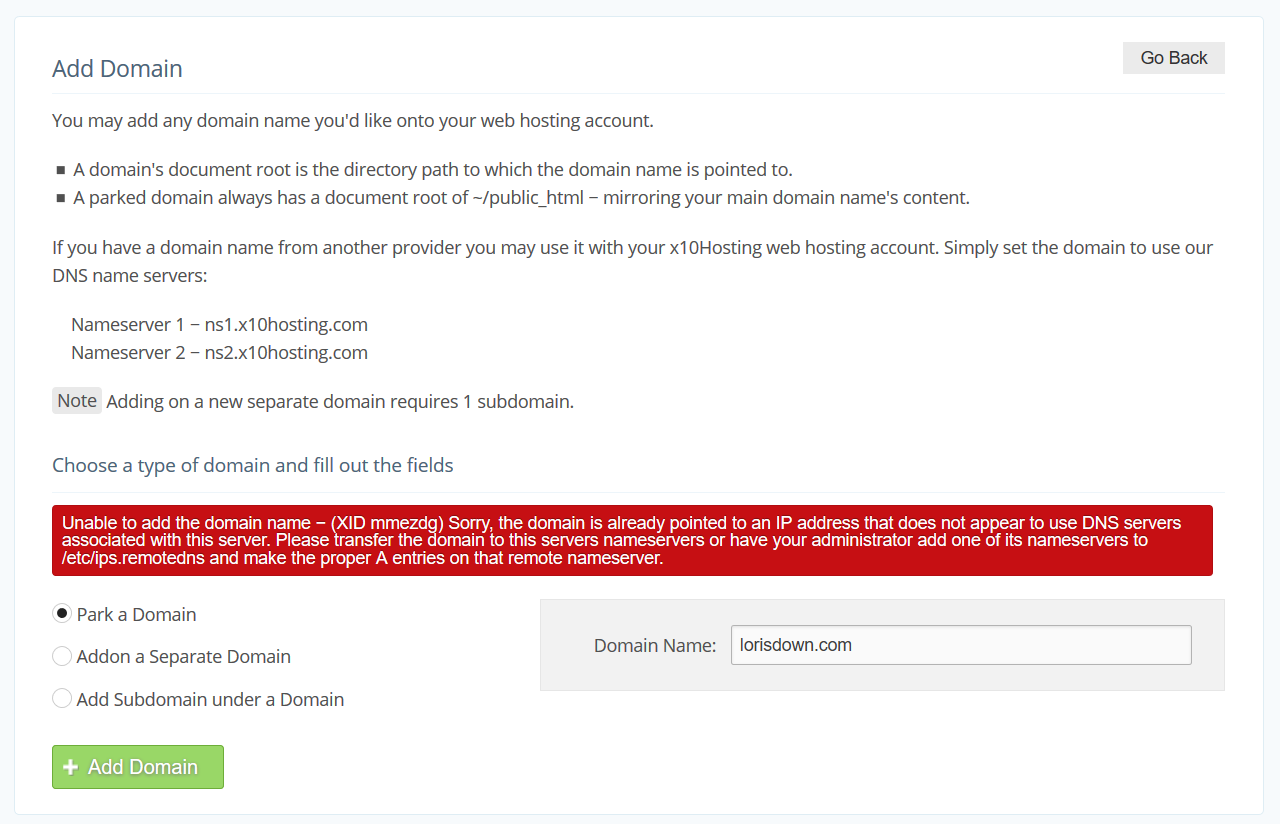
Error message explaining what to do to park the domain.
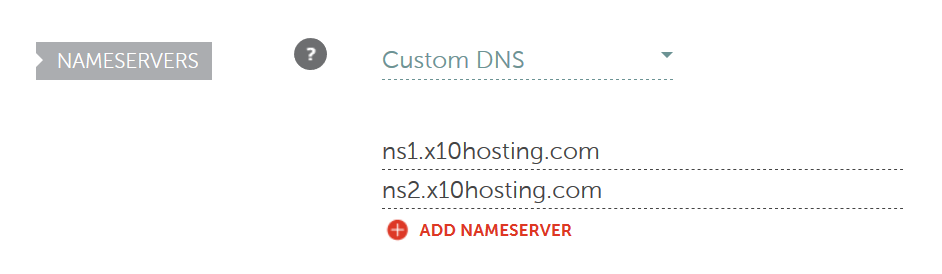
To park a domain to use on x10Hosting, you must do as this page tells you. Go back to Namecheap, and this time stay on the Domain tab of your domain and scroll down to the section titled "Nameservers". Set up your nameservers like so:
With that you can go back to x10Hosting and click "Add Domain". Note that the DNS Server may take up to 48 hours to take effect. If you wish to build a website on top of a subdomain instead of a domain, you may now create a subdomain from your own domain back in the Add New Domain page.
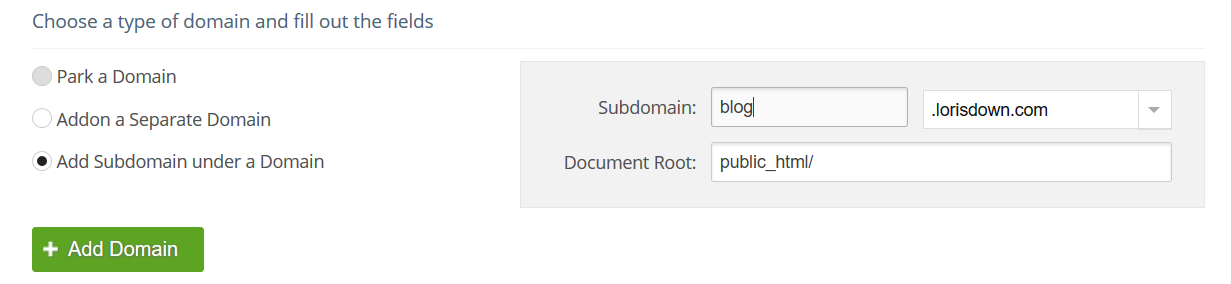
Creating a subdomain requires having the domain parked.
Now you're able to create a website using your own domain or subdomain!
Three times the charm.
Conclusion
And that's that! Now you know how to connect your domains and subdomains to three different free hosting services (Tumblr, Github Pages, and x10Hosting) in three different ways! If you think what you learned here was useful, I encourage you to go and build that blog or portfolio you always wanted using your original brand name like a true professional.
Resources
Articles:
- "How do I use my domain with my Tumblr account" by Namecheap
- "How do I link my domain to Github Pages" by Namecheap
- "Adding your own domain name" by x10Hosting
Domain Name Registrar:
Free Hosts:
Image credits:
- Photo by Tyler Nix on Unsplash
- Screenshots from websites

I'm Liz, the front-end web developer who made this static blog. My writings on here cover art, programming, and working on the Web, but I no longer regularly update this website. Check out my developer portfolio.